-
Empty cart
No products in the cart.
Return to Shop

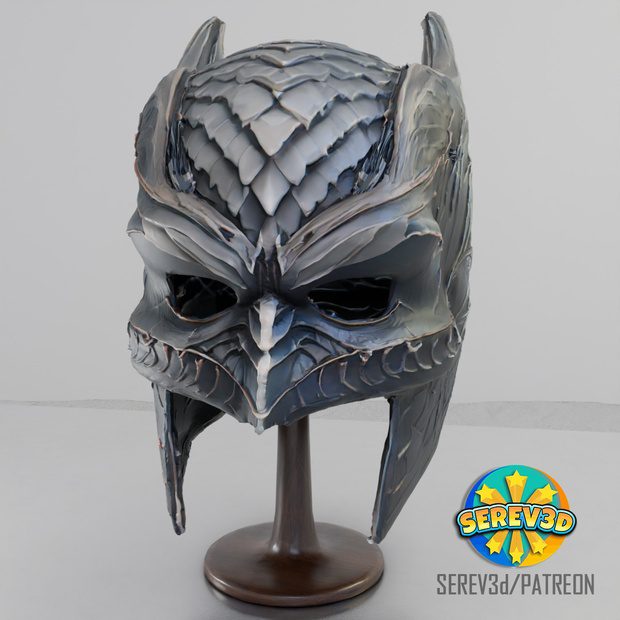
This design was part of our 2024 SEPT releases and has been archived to the Serev3D Vault. You can still get the files:
– by purchasing it in our Serev3d web shop (our designs are always priced lower in our shop than on Cults,Thangs and other 3d printing sites),
– OR by keeping an active paid Patreon membership with us for 3 consecutive months: on the 3rd month we unlock The Vault for you with the access to our entire Serev3d library!
————————–
If you already have the file, here is all the INFO:
Helmet size:
Head Size circumference in Inches: 23.2
Head Size circumference in Centimeters: 58.9 cm
American Hat Size: 7-3/8
(to match the perfect scaling to your head, check our Size Chart in the image gallery) above
Print Resources:
Filament: Polymaker PLA Matte White
Magnets: 8mm x 2mm Neodyium Magnets
Printed on: Bambu P1S
————————-
Print difficulty level: Advanced
Recommended print settings: (If you use Bambu or Orca slicer, all the print settings are automatically loaded in the 3mf file)
-Layer height: 0.2mm
-Wall loops: 2
-Infill: 10%, Gyroid
-Support: In the 3mf file we added manual supports and support blockers so if you load that in Bambu Studio you are good to go,
if you use another slicer: you can activate Auto Tree(Organic) supports with a 28 degree threshold angle, TopZ distance 0.28, BottomZ distance 0.2, and you can add support blockers so the slicer doesn’t put supports under the top dome of the head (you can just leave it fully on auto supports too, just the printing time will be increased a bit, and more filament gets used.
Estimated print time: 16h
—————————
Painting & Post-Processing
Resources:
-Filler primer: Rust-Oleum Sandable Primer Spray, Gray
– Sandpaper: 3m Pro Grade Grit: 120, and 3M Wetordry Sandpaper Grit: 600
Primer: Rust-Oleum Painter’s Touch Spray Paint White
-Base color: Rust-Oleum Aged Metallic Weathered Steel
-Acrylic paint: Pébéo – Acrylic Fine Studio Acrylics – Silver,
-Clear coat finish: Rust-Oleum Matte Clear Coat or if you want glossy look Rust-Oleum Clear Gloss
Steps:
-
Sanding: Begin with coarse sandpaper (around 120-150 grit) to smooth down visible layer lines.
-
Filler Primer: Apply a coat of filler primer (like Rust-Oleum Filler Primer) to fill in remaining imperfections. Let it dry completely.
-
Wet Sanding: Wet sand the primer with 400-600 grit sandpaper for a polished surface. Repeat primer and sanding if needed until the surface is smooth.
-
Primer: Apply a coat of Rust-Oleum White Primer to prep the surface for painting.
-
Base Color Spray: Use a dark grey or the Rust-Oleum Weathered Steel spray paint for the base layer. Apply multiple light coats to avoid drips, ensuring full coverage.
-
Dry Brushing: Once dry, use silver acrylic paint for dry brushing on the scale edges to add depth and a metallic look. You can add some black or dark grey into the creases too.
-
Highlighting: Add subtle highlights with silver or light grey on raised areas for texture, you can add a few lines of gold or bronze if you wish around the raised areas of the cheekbone, nose etc.
-
Clear Coat: Finish with Rust-Oleum Matte Clear Coat for protection and a matte finish (or Rust-Oleum Gloss if you want a shinier look).
-
Glue the magnets to the back
————————————-
Have fun, we are looking forward to see your 3d prints!
Don’t forget to show off your awesome makes on
►Our Patreon chats: https://www.patreon.com/serev3d/chats
►Or in our SEREV3d facebook group: https://www.facebook.com/groups/1569100737016945
Other popular 3d print groups to show off your makes:
–3d Printing for Beginners and Pros
–F**k that, I’ll just 3D print it!
–3D Printing ⚙️

