-
Empty cart
No products in the cart.
Return to Shop

This design was part of our 2024 OCT releases and has been archived to the Serev3D Vault.You can still get the files:
– by purchasing it in our Serev3d web shop, or
-by keeping an active paid Patreon membership with us for 3 consecutive months: on the 3rd month we unlock The Vault for you with the access to our entire Serev3D library!
————————–
If you already have the file, here is all the INFO:
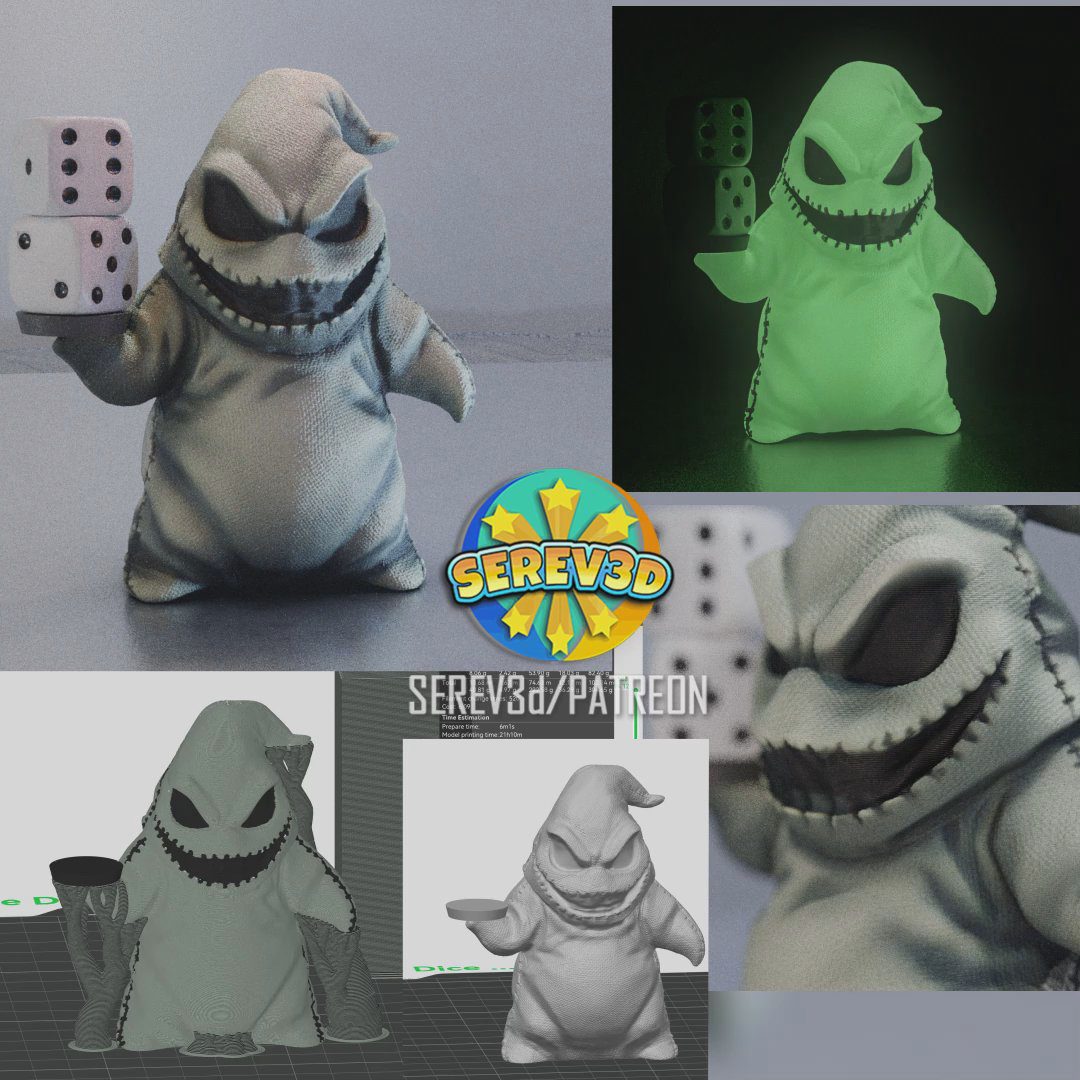
Not just spooky, but even useful, he can even hold your dice for you:
We provided a single and MultiColor 3mf version too of Oogie, the 100% scaled version is suitable to hold any dice, classic or DnD!
Recommended to use Automatic Tree(organic) supports, to support the arms and the hanging top of head part, in a similar way as it’s shown in the sliced version in the video.
You can use glow in the dark filament, or glow in the dark paint to make him look like the real Oogie Boogie from Nightmare Before Christmas!:)
Recommended print settings: (If you use Bambu or Orca slicer, all the print settings are automatically loaded in each version’s 3mf files)
-Layer height: 0.2mm , if you want finer details you can set it to 0.16 (Also you can turn on Adaptive Layer Height, if you want less visible layer lines on the top surfaces of your print
-Wall loops: 3
-Infill: 10%, Gyroid
-Supports: you can turn on Auto Tree support with a threshold angle of 30 degrees, TopZ Distance 0.28, BottomZ Distance 0.2 , it will automatically put some supports under the belly and the arms.
—————————-
Filament resources without the need of paint or post processing:
For the eyes and stiches: GEEETECH PLA 3D Printer Filament Silk Black
For the glowing body: DURAMIC 3D PLA Glow in The Dark Filament Green
—————————–
Resources for painting and post processing:
Filament: Polymaker Matte Black PLA
Filler Primer: Rust-Oleum Filler and Sandable Primer Spray
Sandpaper: 3m Pro Grade Grit: 120, 3m Pro Grade Grit:220, 3M Wet or dry Sandpaper Grit: 600
and/or Bates- Sandpaper, 18 Pack, 12 Grits, 120 to 3000
Primer: Rust-Oleum Painter’s Touch Spray Paint White
Paint: Fantastory Craft Acrylic Paint Set , and SpaceBeams Aurora Glow in the Dark Paint
Clear coat finish: Rust-Oleum Matte Clear Coat or if you want glossy look Rust-Oleum Clear Gloss
Post-processing steps:
-
Sanding: Start with coarse sandpaper (120 grit) to smooth layer lines, then use finer grits (220) and lastly (400-600) for a more polished surface.
-
Filler Primer: Apply a filler primer coat to cover imperfections. Let it dry completely.
-
Wet Sanding: Use 400-600 grit sandpaper for wet sanding the primer, repeating as needed for smoothness.
-
Final Primer Coat: Apply a thin layer of regular primer to create an even base for painting.
Painting & Sealing: Paint with your chosen color from the acrylic paint set, then apply a clear coat (matte or glossy) for protection and finish.
(Allow each layer to dry fully before moving to the next for the best results.)
—————————–
Have fun, we are looking forward to see your 3d prints!
Don’t forget to show off your awesome makes on
►Our Patreon chats: https://www.patreon.com/serev3d/chats
►Or in our SEREV3d facebook group: https://www.facebook.com/groups/1569100737016945
Other popular 3d print groups to show off your makes:
–3d Printing for Beginners and Pros
–F**k that, I’ll just 3D print it!
–3D Printing ⚙️
